Adding Your Covid-19 Vaccination Record to Your iPhone Wallet
/Apple’s Wallet app on iPhone is more than just digital access to your credit cards. It can hold many other things such as club membership cards, store payment and reward cards (e.g. Apple Store, Starbucks, Panera Bread, Staples etc..), health and car insurance cards, tickets to events (movies, live shows) and even travel membership cards (airlines, hotels, boarding passes).

With iOS 15.1, Apple has added the ability to add your state registered Covid-19 vaccination record to the Wallet app allowing you to have quick access when needing to show proof of vaccination for entry into venues that require it. Let’s find out how to do this. Note that all these steps must be done on the iPhone itself.
First, you’ll need to update your iPhone to iOS 15.1 or later (iOS 15.0 does not have this feature so you’ll need to make sure your iPhone is completely up to date).
The following directions will be simpler if you follow them on another device while you add the Vaccination Record to your iPhone.
Once your iPhone is on iOS 15.1 (or later), open Safari and go to the site provided by your state that records vaccination records. For California, it’s https://myvaccinerecord.cdph.ca.gov. For other states, you will need to search for the equivalent site that keeps track of these medical records.

Read this page and fill out all the information about yourself. Note that you will need to enter either the mobile phone number or the email address used when you registered for your original vaccination. One of these items must match what is in the system for your or this won’t work. If someone else registered your vaccination appointment using a mobile number or email address other than your own, you may need to contact them to help you.
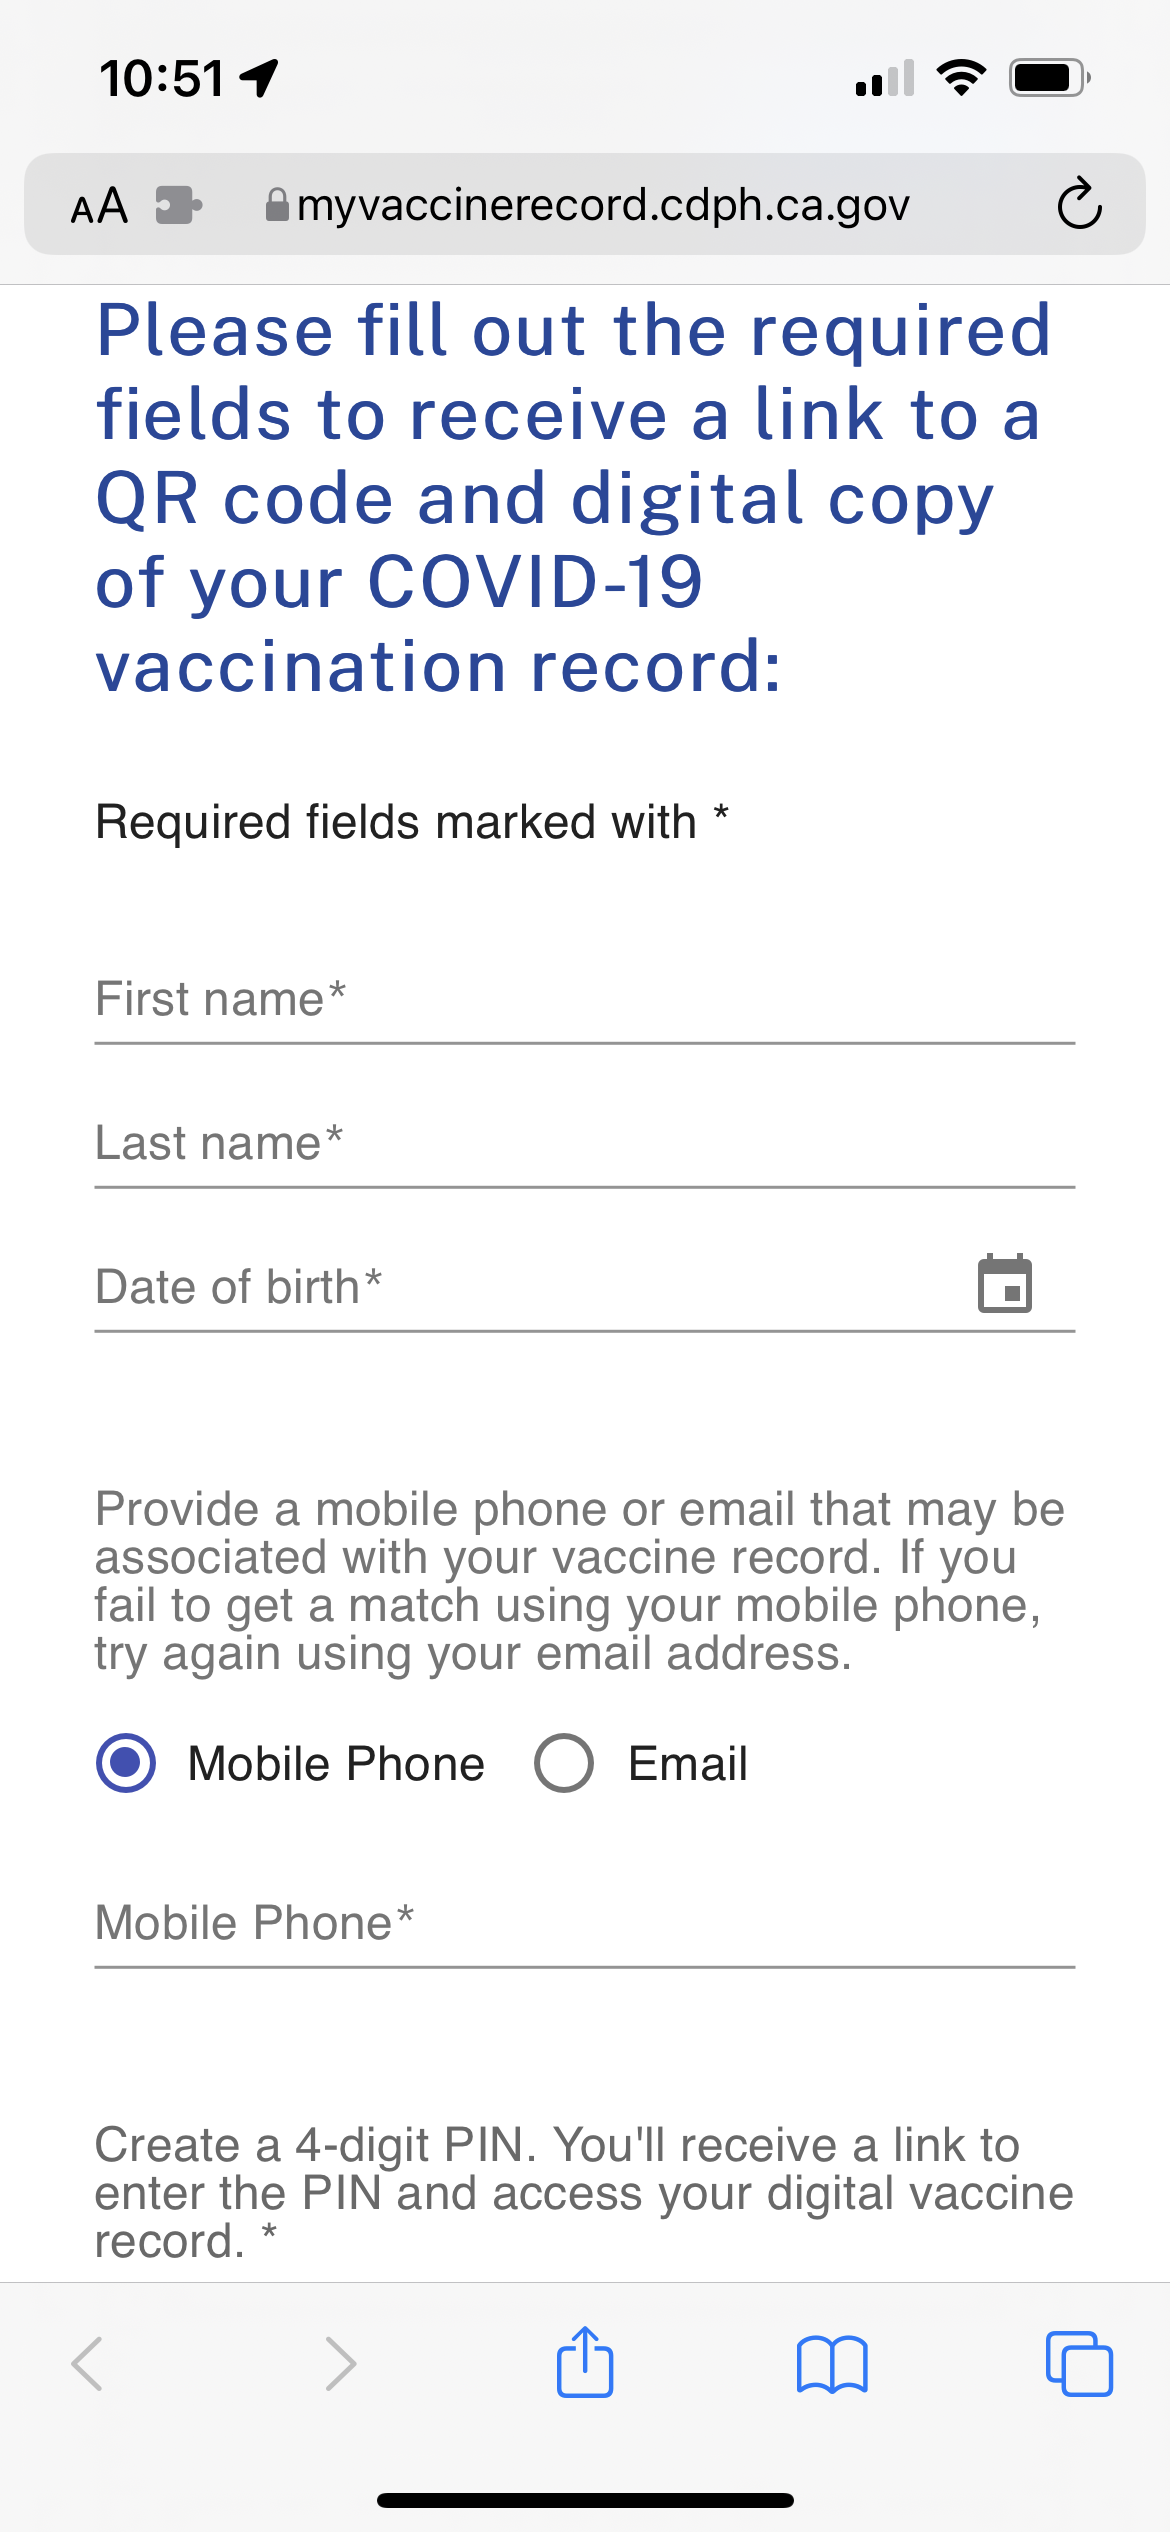
To prove that you are the owner of the iPhone that will receive the vaccination record, you will need to create a 4-digit PIN that will only be valid for 24 hours. Select the checkbox to verify your information is and then tap the “Submit” button.

To confirm it’s really you, you will receive either a text message or email with a link to go to the next step.

Tap on the link to go to a verification page where you will enter that same 4-digit PIN you just created. Note that this must be done with 24 hours of receipt of the text or email. Enter the PIN and tap “Submit”.

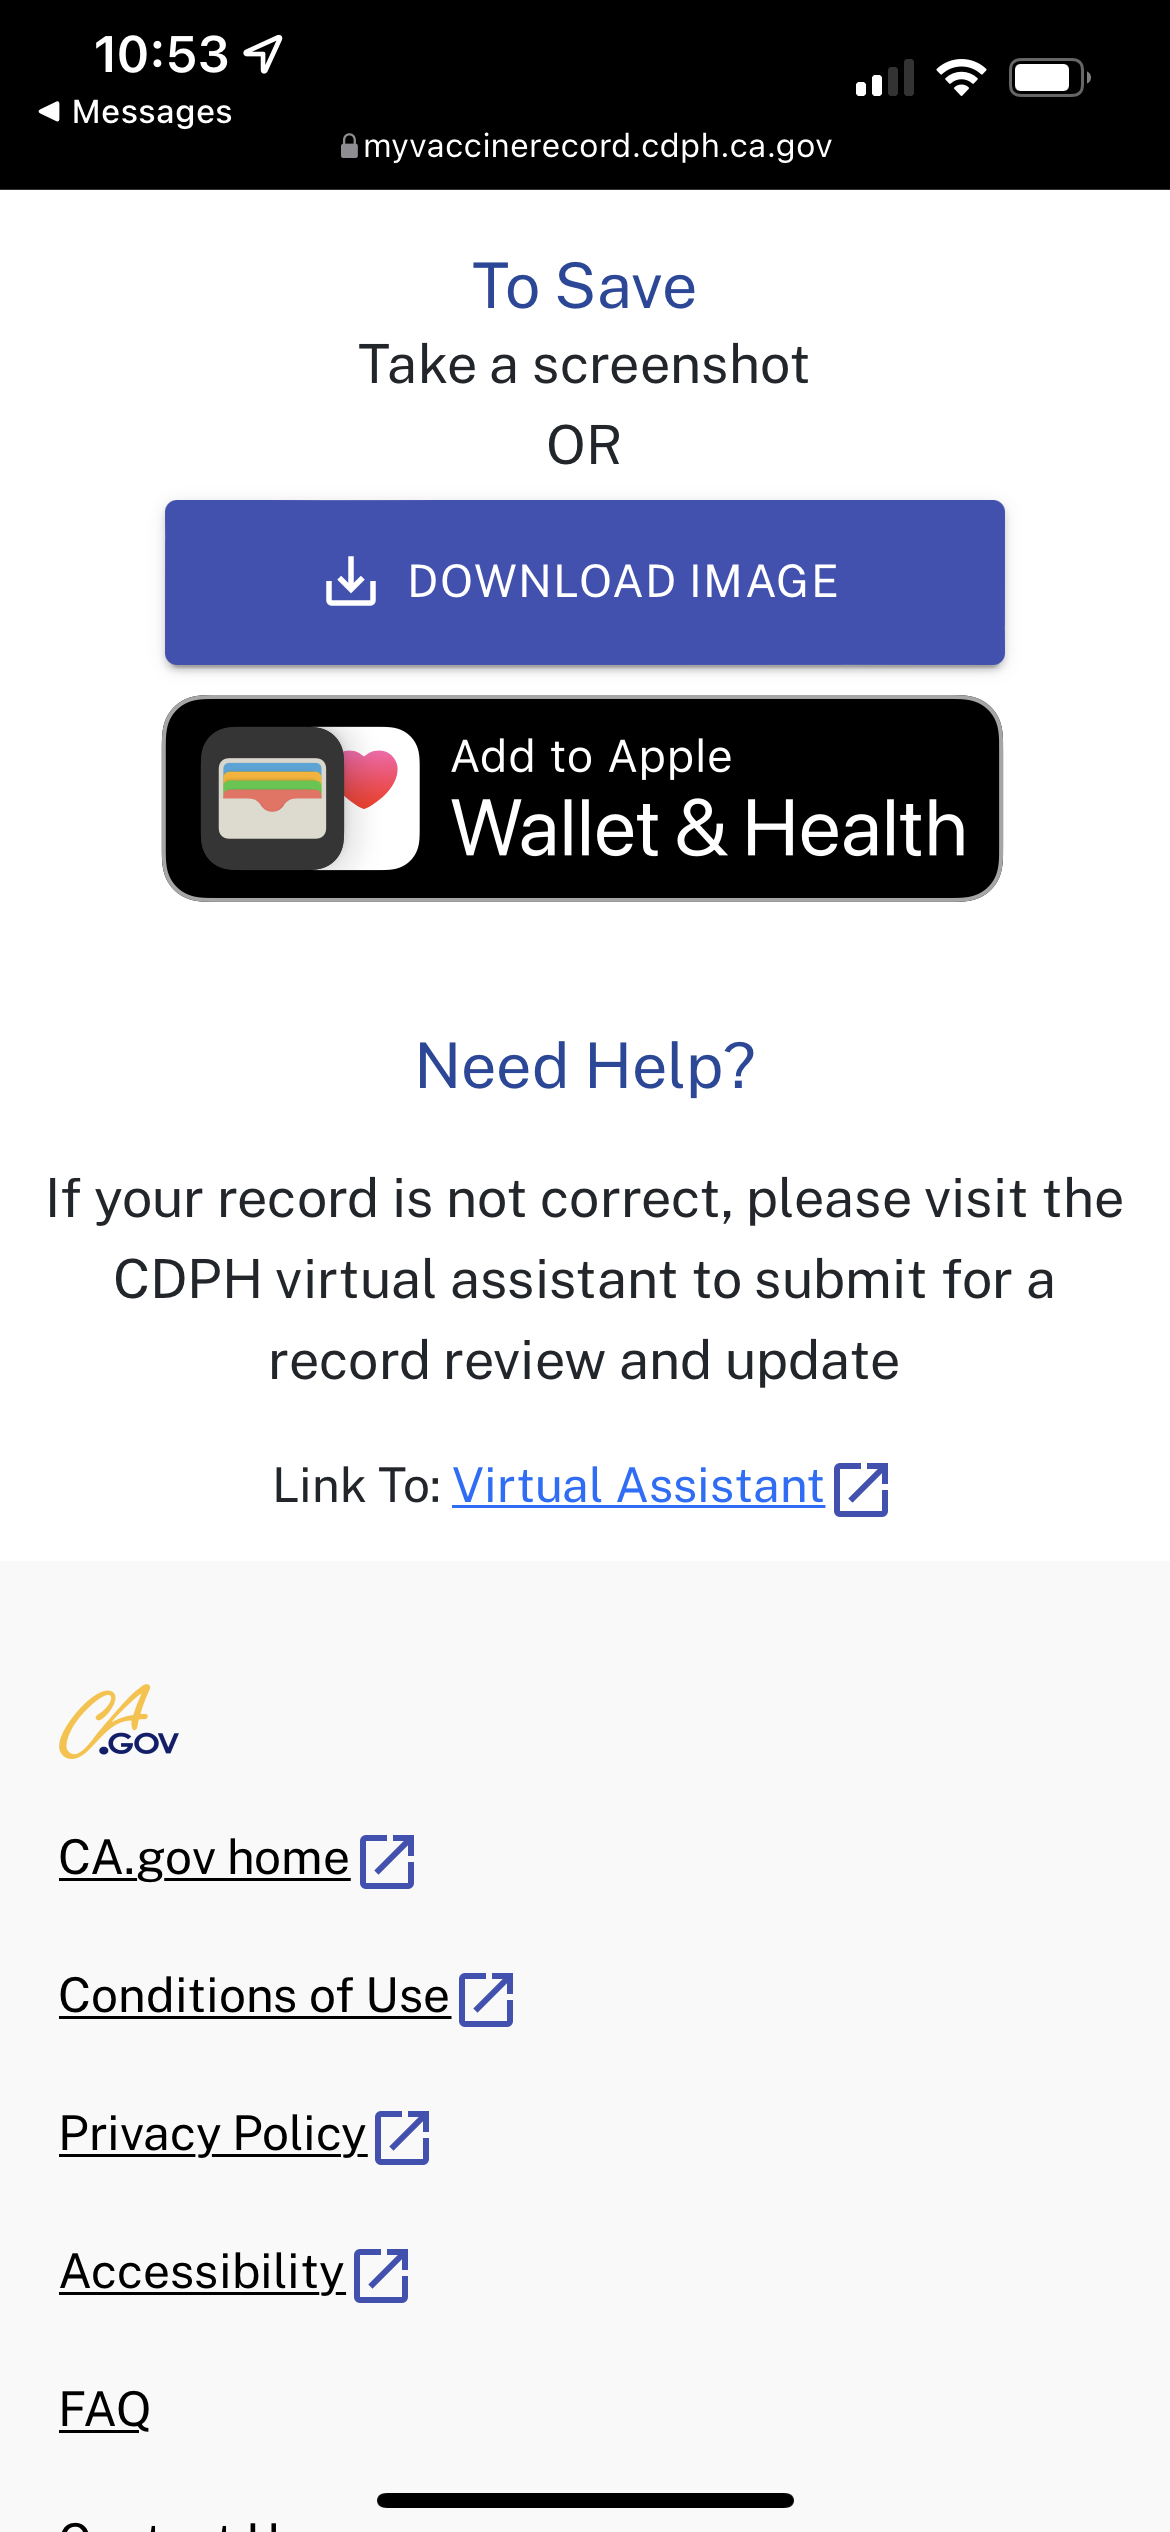
You will then be provided with a Smart Health Code image (similar in concept to a QR code) that can be read by specialty scanners to verify your vaccination. From here, you can either take a screenshot to save the image to Photos on your iPhone or you can scroll down a bit more and add it directly to your Wallet app by tapping the “Add to Wallet” button.

Scroll down a bit to see the “Add to Wallet” button.
Once you’ve done this, open the Wallet app on your iPhone and you’ll note a new Covid-19 vaccination card issued by the State of California. You can show this when asked for proof of vaccination at venues that require it.
